Recorded Lectures
Helpful Summary – Basic Couse Delivery
Asynchronous delivery often involves recording lectures. These are often done as voice-over PowerPoint with screen recording software like Camtasia. Recorded lectures are less anxiety-provoking for the teacher since you can do multiple takes and are more immune to those last-minute technology glitches. You do lose some of the immediacy of live, synchronous classes. Recorded lectures can be useful when your schedule makes being available at regular class times difficult, as they can be pre-packaged and posted in advance. If you want to create these, we recommend using Camtasia software that is free to all students, staff, and faculty at UBC.
With recorded lectures, there are possibilities to embed questions and sophisticated interactions into the video stream using tools like Articulate Storyline. Contact the Centre for Instructional Support if you want to learn more about these Articulate possibilities.
Live Sessions
With synchronous (live) delivery methods using tools like Zoom or Collaborate Ultra, there is the compelling immediacy of live performance, and good opportunities to seek and respond to student questions in real-time. Students have been commenting that it is easier to watch an hour-long live session than an hour-long recording. The ability to respond to questions in real-time is an important advantage. Often the simplest approach to gather questions is to encourage students to type their questions into the chat window and then you periodically stop to review (or have a TA monitor) the chat stream and answer a few of the most pertinent questions. You can have some moments of silence at the end of a segment to give students time to think and post some pertinent questions in the chat window. You typically don’t answer all questions, just those that will best advance student understanding and help them get the most from the lesson. This allows you to better adjust instruction “on the fly” to better serve students’ immediate learning needs. This immediacy of live sessions can also be a disadvantage when technology glitches can be anxiety-provoking and disrupt the flow. These live sessions can also be easily recorded, posted in Canvas, and later reviewed by students.
Learn About Zoom (short videos)
–––
Learn About Collaborate Ultra (short videos)
–––
Adding Interactivity to Live Sessions
There many great strategies to punctuate your online classes with activities to help student learning. We should aim in any kind of teaching to vary the stimulus every 10-15 minutes to keep the learners engaged.
Chalk and Talk
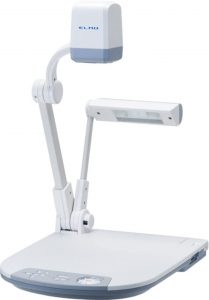
Use UBC Classroom ELMO Document Cameras to present live or do recordings
Do document camera recordings. The ELMO document cameras in most UBC classrooms have an SDcard port and USB port. You can easily record document camera videos directly to either the SD or USB ports. Once you have captured the videos, you can edit them in Camtasia, and then post them directly in Canvas. Contact the Centre for Instructional Support if you want to learn more about this possibility. See YouTube to get a general idea and also Google search for the manual for specific ELMO model to get the specific directions.
Use your cell phone to make an AD Aoc Document Camera
A number of interesting “hacks” have surfaced where teachers have used their smartphone camera to build an ad hoc document camera. People are live streaming into Zoom using this kind of setup. It is often as simple as joining the session from your phone and laptop at the same time. Using the laptop to send audio and the phone to capture video. As the moderator of the session on the laptop, you can promote your phone to Presenter, which will broadcast the video to everyone. All that is then required is a method to hold the phone above the document you are writing on. People use a variety of objects from tripods, to lamps, to stacks of tins to hold their phone.
Using an iPad and Apple Pencil (or other tablets)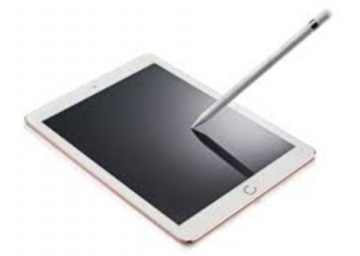
You can also use an iPad to annotate existing documents or do whiteboard sessions in Zoom. There isn’t a really good way to do this in Collaborate Ultra but works easily in Zoom. Just download the Zoom iPad app from the app store and launch Zoom. Then I was able to application share and to share iPad screen and annotate PDFs easily. I have an apple pencil which makes it quite easy. The Zoom iPad app doesn’t do recording – so you would need to login into Zoom from your laptop to start recording the iPad (iPad with presenter privileges). This would also work well with a MS surface and stylus.